
422 million records were leaked worldwide in only the third quarter of 2024. Surprising? Maybe. Avoidable? Definitely.
Cyberattacks often make the headlines. But what’s talked about less is how easily those breaches can start with just one unprotected document.
This is where document protection comes in.
At a Glance:
- Document protection involves using one or more methods to stop unauthorized access, sharing, or edits.
- The most effective way is a 3-layer approach. Control who can access the document, verify its integrity using tools like QR Codes and change tracking, and ensure long-term safety through secure backups and an incident response plan.
Let’s break it down.
A. What does document protection really cover?
1. More than just security
Password-protecting a file isn’t where document protection ends—and thinking it is can leave big gaps. Real protection means asking the right questions:
- Confidentiality – Who should be able to see this document? And how do we keep everyone else out without making it harder for the right people?
- Integrity – Has anything changed since the document was created? Can we trust that it’s still the original?
- Availability – Can the intended party access it when they need to, without delay or unnecessary friction?
- Compliance – Are we meeting the legal and regulatory standards that apply to our business or region, like GDPR, HIPAA, or SOX?
Each of these plays a different role. Without integrity, a signed contract loses its meaning.
Without availability, even the most secure document is useless. Effective protection means getting all of this right, not just one part.
2. Digital vs physical documents
Many teams treat physical and digital documents as separate issues. That’s because digital files dominate daily workflows.
Many regulations still require originals to be stored in print like signed contracts, financial records, and certificates.
Since paper is harder to track or monitor, it brings a different kind of risk. That’s why any document protection strategy should account for physical document security as well.
3. Documents as assets
Most organizations treat documents as by-products, like something created along the way.
But documents should be seen as assets. Like any asset, they’re owned by specific people and carry value.
Protecting them is a direct way to protect your business from losing sensitive data to ransom demands, black market leaks, or corporate espionage.
B. Understanding the risks you’re up against
Before you can protect your documents, you need to understand what you’re protecting them from.
Risks don’t always come from obvious places, so here’s a breakdown of where they come from and what enhances the possibilities of things happening.
1. Threat types by context
a. External threats
These are threats that come from outside the organization, and everyone is aware of them.
Hackers, document fraud, phishing scams, data breaches, ransomware attacks, and more are all external threats.
They target weak points in your system, often starting with an unprotected document. The motive can range from demanding ransom for the held data to using the data for competitive advantage.
b. Internal risks
These risks come from current or former employees. The motive might be to benefit from confidential information or to take revenge on the company. However, it isn’t always malicious.
For example, someone accidentally forwarding a confidential document to the wrong email, changing a figure in a shared file, or deleting something without a backup can lead to similar dangers.
2. Risk multipliers
These aren’t threats by themselves, but they make every existing risk more dangerous if not addressed properly.
a. Remote work
Remote teams rely on multiple devices, cloud platforms, and unsecured networks. That increases the number of places a document can be copied, downloaded, or accidentally exposed.
Even if your document is secure in one system, it only takes one person sending it over a personal email or saving it on an unprotected laptop to create a new risk.
More access points = more chances for something to go wrong.
b. Unmanaged access/sharing
The more freely documents are shared, the less visibility and control you have. If anyone with a link can access the file, you can’t say who actually viewed it or whether it was forwarded beyond your team.
This multiplies the risk of leaks, unauthorized edits, or data falling into the wrong hands, because there’s no clear trail of who did what.
c. Outdated systems
Many legacy systems don’t support basic protections like encryption, access logs, or even version control.
That means if a document is tampered with or stolen, there’s no way to trace it or even know it happened.
Plus, the hardware itself can fail. Physical servers, aging hard drives, or non-redundant storage setups are more prone to data loss.
C. Framework for protecting documents (The 3-Layer approach)
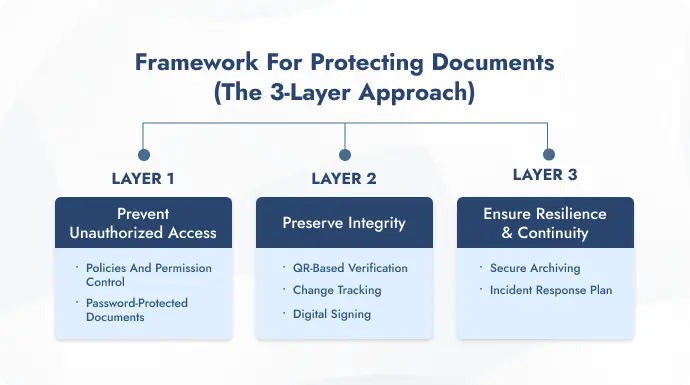
Most people make the mistake of approaching document protection in bits and pieces rather than aiming for a system that holds up across scenarios.
This three-layer approach helps you protect documents without missing the bigger picture.
Layer 1: Prevent unauthorized access
a. Policies and permission control
Permission control is about granting the least amount of access necessary for someone to do their job.
This includes role-based access (e.g., edit rights only for document owners, view-only for collaborators) and time-bound access (e.g., revoke access once a project ends).
Pairing this with clear internal policies makes it technically enforceable. In this, define everything—like protocols for external sharing, whether printing and copying are allowed, etc.
Here’s how to set permission controls (step-by-step):
In Microsoft 365:
File > Info > Protect Document > Restrict Permission by People > Select Restricted Access > Add emails under read (view only), change (edit access), or full control (manage permissions).
Note: This feature is available only with Microsoft 365 and IRM enabled. If it’s not visible, ask your admin to set up IRM or use the “Restrict Editing” option instead.
In Google Apps:
Share > Under each person’s name, click the dropdown > Choose access level from viewer, commenter, or editor.
b. Password-protected documents
While simple on the surface, password protection is often mishandled or underutilized. Weak, reused, or widely shared passwords create a false sense of security.
But when combined with view restrictions and expiration dates, it becomes a strong frontline defense.
Make sure to:
- Avoid default or commonly shared team passwords
- Update passwords when roles change or team members leave
- Share passwords separately from the document link—ideally through a different channel
- Never store passwords in plain text apps like Notepad
Here’s how to password-protect a file in MS Word:
File > Info > Protect Document > Encrypt with Password > Set a strong password
Note: For PDF files not created in Word, use Adobe Acrobat (for sensitive content) or tools like Smallpdf or iLovePDF (for general use) to apply password protection.
Layer 2: Preserve integrity
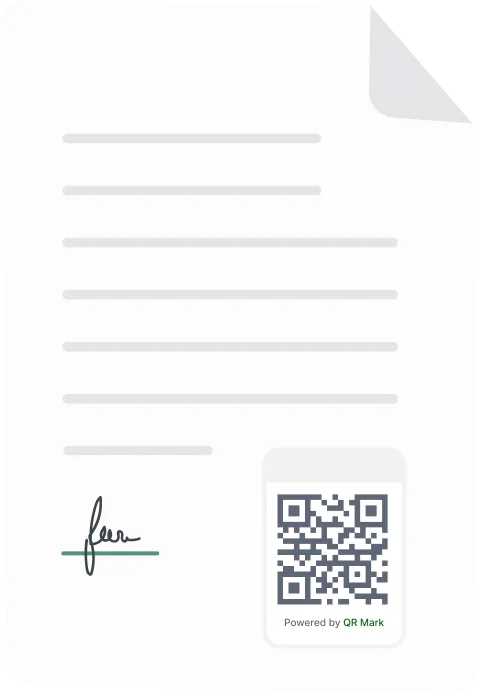
a. QR-based verification
QR codes offer a simple but effective way to verify documents, especially when they’re printed or shared as static files.
They link the document to a secure, verifiable domain, allowing anyone to confirm its authenticity within seconds with a mobile scan.
This is helpful for files where even a small change can create big problems like regulatory certificates, offer letters, invoices, or contracts. But it can also just serve as a digital proof that the document is authentic.
We’re using QR Mark for the steps below, but you can use any trusted document protection QR code provider.
To set this up:
Sign up or Log in to qrmark.com > Settings > Add a custom domain > Head to Verifications > Upload your PDF document > Generate the QR verification image > Adjust the size and placement as needed > Download the verifiable PDF.
Tip: To simplify the process, use QR Mark’s add-ons for Microsoft 365 or Google Workspace. This allows you to insert the verification QR while editing the document itself.

b. Change tracking
After providing the access, tracking it is just as important. Change tracking helps ensure that a document’s integrity stays intact, even when multiple people collaborate.
It also helps with version control, so you can always go back and retrieve older versions if needed.
Here’s how to enable it:
In Microsoft Word:
Review tab > Track Changes > Lock Tracking (so only owners can disable it) > Choose “Simple Markup” to keep it clean or “All Markup” to see every edit.
In Google Docs:
Simply open the doc > Click the clock icon in the top-right corner.
c. Digital signing
The digital signing process finalizes a document, ensuring that any subsequent changes will invalidate the signature. This is essential for contracts, approvals, or any document that needs to stay in its final form.
It proves two things: The document came from a verified source, and it hasn’t been changed since it was signed.
In regulated industries, this also helps meet legal or compliance standards, like eIDAS in the EU or ESIGN in the US.
Note: You’ll need a digital certificate issued by a Certificate Authority (CA). These aren’t free, your organization might already have one in place. If not, you’ll need to request it separately. (Refer to Microsoft’s guide for how to obtain one.)
Here’s how to digitally sign a document in Microsoft Word (once you have a certificate):
File > Info > Protect Document > Add a Digital Signature > Add signing purpose and commitment type > Select your name > Sign
Layer 3: Ensure resilience & continuity
a. Secure archiving
Archiving means storing documents that are no longer in daily use. But they’re still important from a legal, historical, or operational standpoint and must remain provably authentic and unaltered.
Many regulations require organizations to retain documents for 5–10 years or more. Failing to produce these when needed can lead to legal trouble or failed audits.
Even outside of legal needs, archived data can be useful for internal analysis, spotting trends, or learning from past decisions.
Today, this is mostly done through cloud-based Document Management Systems (DMS) that keep data encrypted and easily accessible.
b. Incident response plan
No security system is invincible. What separates robust organizations from vulnerable ones is how well they respond when things go wrong.
An incident response plan helps you do exactly that. For document protection, it should include:
– Detection: How will you know if something went wrong? (e.g., audit alerts, version mismatches, unauthorized access logs)
– Containment: Restrict further access immediately to prevent more damage.
– Recovery: Restore the original document from secure backups or archives.
– Review: Identify what failed and fix the gap so it doesn’t happen again.
D. How to choose the right document protection solution
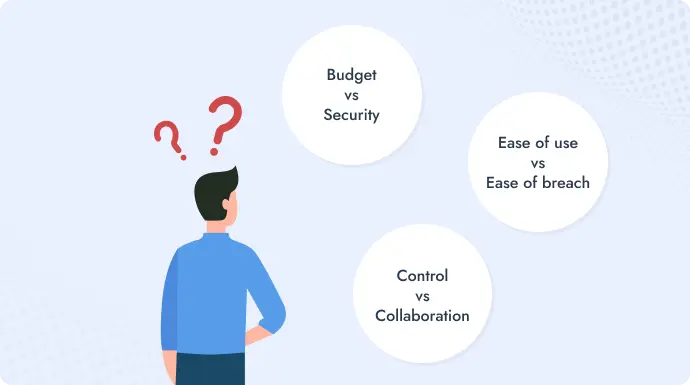
The framework above gives you a complete view, but not everything needs to be applied at once.
Every business handles documents differently, some need strict control, others need flexibility.
The following points will help you decide what to prioritize based on how you work.
1. Budget vs. Security
You don’t need to burn a hole in your pocket to protect documents, but you do need to be smart about what you’re protecting. Internal memos don’t need the same level of encryption as legal contracts or customer data.
The real risk is assuming all tools are equal just because they’re affordable. Or overpaying for features you’ll never use.
Here’s how to spend smarter without cutting corners:
– Classify documents into high, medium, and low-risk categories—and reserve your budget for protecting high-priority files.
– Use what you already have. Tools like Google Workspace and Microsoft 365 offer solid built-in protections for everyday documents.
– Start with freemium tools and only upgrade when your needs actually demand it.
2. Ease of use vs. Ease of breach
If a protection tool is too complex, your team won’t use it right or at all. That’s where mistakes happen. On the flip side, if it’s too easy and open, you’re inviting breaches.
The key is finding the middle ground: tools that are simple enough to integrate into daily workflows, but strict enough to enforce real security.
3. Control vs. Collaboration
Too much control can slow down work. Too little can open the door to leaks or tampering. The challenge is enabling collaboration without giving away the keys.
If multiple people need to work on a document, you don’t have to give them all full access. It’s about setting the right level of access, not denying it entirely.
E. Document protection best practices for the modern workflow
1. Protect the document lifecycle, not just the file
Security often starts strong, then fades. Documents go through a full lifecycle: creation, editing, sharing, storing, and archiving.
Each of these stages introduces its own risks. If you only secure the final file, you’re leaving everything before that wide open.
For example, a contract may be well-protected as a PDF, but what if it was edited carelessly before export? Or emailed without access controls? Therefore, add protection at each stage and not just at the start or end.
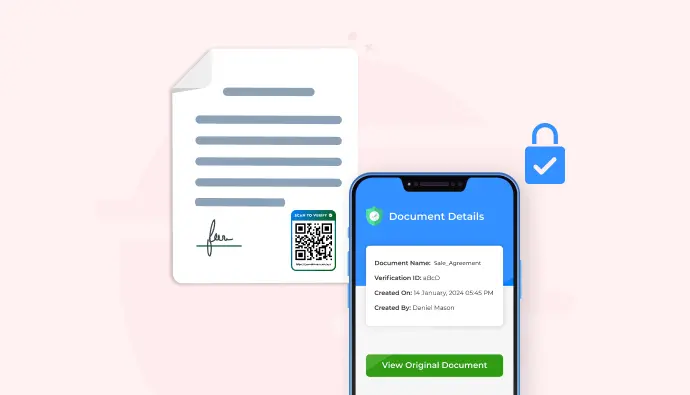
2. Make verification part of the document itself (with QR Codes)
One of the smartest, frictionless ways to secure documents today is by linking them with verifiable QR Codes.
With this, everything from insurance papers and warranty cards to contracts can be protected from misuse.
It’s a preventative measure. Anyone holding the document can scan and confirm its authenticity, but they can’t replicate it. A verified QR code can only be generated from the document owner’s account.
And it’s cost-effective too, since pricing is usually based on the volume of documents you secure.
Want to give it a try? Sign up for QR Mark and enjoy 3 free verifications each month to experience its impact firsthand.

3. Limit exposure time with expiry and revocation controls
Documents don’t need to stay accessible forever. The longer they remain open, the higher the risk of them being misused.
That’s where expiry links and revocation controls come in. Expiry links automatically cut off access after a set time. Revocation lets you take back access anytime, whether it was through a shared link or direct permission.
4. Educate everyone, not just IT
Training should be part of your document protection strategy. Not just for IT, but for anyone who creates, shares, or stores documents.
This includes basics like recognizing risky sharing habits, setting the right permissions, using secure platforms, and reporting incidents early. The more informed your team is, the fewer gaps you’ll need to patch later.
F. FAQs
1. What is the meaning of document protection?
Document protection means keeping your files safe from unauthorized access, editing, copying, or misuse. It’s about making sure only the right people can view or change a document—and that it stays secure and trustworthy.
2. Why isn’t password protection enough?
Because passwords can be guessed, reused, or shared easily.
Once someone gets the password, they have full access. That’s why password protection alone is not reliable. It should always be combined with other controls like permission settings, expiry links, or digital verification.
Q3. Where is document protection in Word?
Go to: File > Info > Protect document (dropdown).
Here you’ll find multiple options: always open read-only, encrypt with a password, restrict editing, restrict access, add a digital signature, and mark as final.
Each of these helps you control how others can view, edit, or share the document, depending on the level of protection you need.
4. What documents need to be protected?
Any document that contains sensitive, confidential, or business-critical information should be protected. This includes, but isn’t limited to:
– Legal contracts and agreements
– Financial records (invoices, tax documents, audits)
– Employee and customer data (IDs, addresses, medical info)
– Intellectual property (designs, blueprints, research)
– Retail documents (bills, warranty cards, insurance papers)
– Internal strategy documents (plans, reports, memos)
Summing it up
Now you’ve understood the meaning, need, and process of document protection. Remember, this remains important for individuals, small teams, and large organizations alike.
But the good news? You don’t need to overhaul everything overnight.
Start where it matters most: classify your documents, apply the right layers of protection, and bake security into your daily workflows.
Make it a practice to add QR Codes to documents where you want to integrate authenticity and traceability.
Have any doubts or opinions? The comment section below is active, we’d love to hear from you.
2 responses to “Document Protection Done Right in 2025 & Beyond”
I really like how the post highlights integrity. When we’re talking about sensitive contracts or reports, it’s crucial to verify that the document hasn’t been altered in any way. That’s where technologies like change tracking and digital signatures come into play. It really makes a difference.
Absolutely! We’re glad you highlighted that. And of course, innovations like QR codes make maintaining integrity even easier for everyone.